Facebook Timeline - the basics by Raninmaker

Before proceeding any further, let us see what is there in TIMELINE which will really benefit me or my Business Page.
1. TIMELINE Cover Photo:
2. Tabs and Application:
3. Pin and Highlight:
How to handle elements of TIMELINE?
Now let us get some basics right, on how to handle some elements to make our page marketable.
I. COVER PHOTO - TIMELINE
Almost 95% of the websites, I visited, have a banner at the top of their website's home page, covering a huge horizontal portion. This is so done to create an image about the website for the viewers. It’s not to exaggerate if I say, this picture can really convey 'thousand' words. The image must be a minimum of 399 pixels across to be used as the cover photo. The cover photo maximum dimensions are 850 pixels by 315 pixels.
The Facebook allows you to either directly upload an image from your computer, or you can make a selection out of your collections in "Photos" section. Once you upload the image, you will get an option to adjusting the image so to make sure that a viewer is getting the correct visual.
Do Not Cross the Lines

- Like Us
- Share with your friends
- Call me @
- Email me @
- Skype me @
- My Website URL, etc.
II. THUMBNAIL - TIMELINE
III. SHOWCASE THE POST - TIMELINE
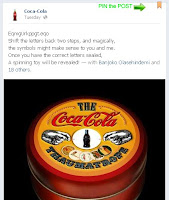
Even the posts can be selected to highlight. You can select the post that you think should not be missed by any of your fans-followers. To highlight the post, click the star icon at the top right hand side of the selected post. This will make your post spans all the way across the TIMELINE.
A new feature of PIN has been developed by the Facebook TIMELINE. This feature enables a post to stay at the top of your TIMELINE for maximum duration of a week. Market your offer, discount & limited period deals, make more people to give clicks to your link for free stuff or report downloads, or simply make sure that all your fans are aware of the contest & polls running by you during that particular duration. With a "PIN" to your most important post, you do not have to worry about new posts bringing down the effectiveness of the other posts.
NOTE:

IV. TABS AND APPLICATIONS - TIMELINE
You can now showcase 12 of your applications associated with your business page, and can make selected tabs / applications to display prominently below the cover image.
There is a space to display 4 tabs / application to get below the Cover Image. Out of which "Photo" is the default tab, so you can choose 3 more, based on where you want your viewer to get engage.
To get your tabs / applications among the first four displayed ones,
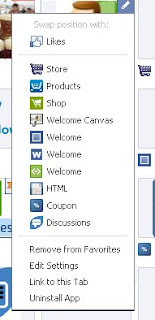
- Click the 'pencil' icon in the top right corner.
V. TABS AND APPLICATIONS - 2 - TIMELINE
It’s not yet over with Tabs and Application. Facebook understands that these Tabs and Applications
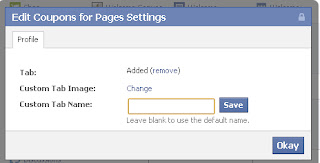
To name & provide image to your tabs / applications
- Point the tab / application you want to move to the top.
- Click the 'pencil' icon in the top right corner.
- Select the tab / application that you want to interchange position with.
- Click to "Edit Setting"
Do let me know if you think there are more which I need to include here in this article, as a Social media marketing profession.

posted by Prateek at
1:36 PM
![]()
![]()

2 Comments:
Hi,
Thanks for the interesting post, but I wanted to know that how to create those extra pages. As you said, when I click on the icon I can see 3-4 basic options provided by FB. I would like to know the details to create those pages. You can view my FB page here AConceptdesigns
Hi,
I think with new page, you meant new tab for your business page.. isnt it.
* Type the keyword "static welcome tab" in the search box above.
* Choose the tab of your choice.
* Install the application.
You are all set to use the New Tab in your page. :)
Post a Comment
Subscribe to Post Comments [Atom]
<< Home